Planting Grocery Store Bell Pepper Seeds

Planting grocery store bell peppers – can you do it? Sometimes you taste a bell pepper from the grocery store and it tastes so delicious, so why not save seeds? You can, with some caveats to consider — let’s talk about it.
Saving Seeds from Grocery Store Peppers
Saving Grocery Store Bell Pepper Seeds
The very first thing to know if that you have to save the seeds from a ripe pepper — yellow, orange, red, etc. Green peppers are actually immature fruits, so don’t bother trying them (unless you are up for a challenge, LOL).
The next thing is to know that there is a very good chance that the pepper you bought is a hybrid. Hybrid peppers usually don’t breed true (unless the parents are very similar), so you may end up surprised with the fruits that grow. (Please don’t confuse the term “hybrid” with “GMO”; they are not the same thing.)
Finally, you may have a low germination rate, due to various circumstances, so plant more seeds than you think you will need. If they all sprout, great! It’s easier to get rid of the weaker plants, than it is to wait and wait and your seed doesn’t sprout.
Planting Grocery Store Bell Pepper Seeds
Now comes the fun part; saving those seeds and planting them! Here are the steps:
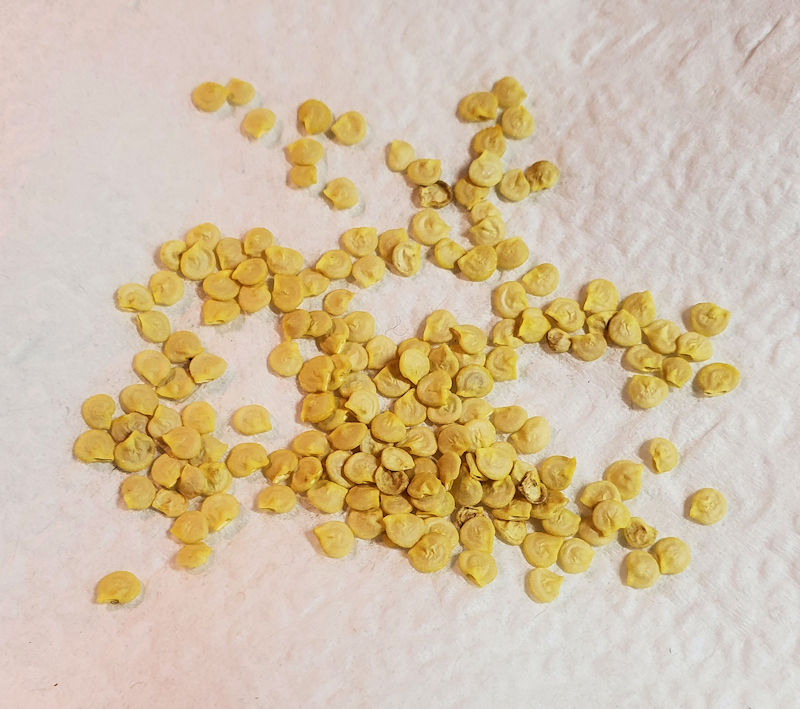
- Cut open your pepper and remove the seeds with your fingers. It’s easiest to do this over a paper plate or paper towl.
- Once the seeds are all out, let them dry out some on the paper plate or on a paper towel. If you’re in a dry climate, 1 day may be fine. In a more humid environment, plan on several days.
- Once the seeds are dry, take a look at them carefully. Discard any seeds which are dark, or which seem misshapen.
- Using your favorite seed starting medium, plant your pepper seeds.
- Water in the seeds well, but don’t leave them in a puddle of water.
- Remember to cover your container with a plastic dome, plastic wrap, sandwich bag or the like. Don’t make it airtight; you just want the container to keep some of the moisture in.
- If you have a seed germination mat, please use it; peppers really like to have bottom heat for germinating!
- Check your container every few days; if it seems dry, mist the seed starting medium with some warm water.
Peppers usually take between 5 days to 2 weeks to sprout, depending on the environment and the pepper itself. Don’t give up until it’s been 3+ weeks and no sign of germination. By planting extra seeds, you raise the chances of getting at least one to sprout!
(Note: If you are trying to germinate a habanero or other really hot pepper, they may take 4 weeks to germinate — don’t give up on them until 5+ weeks.)
You don’t need to put your seeds under a light for them to germinate, but once they do, move the seeds to a sunny windowsill or under a plant grow light. And once your weather gets warm enough (70+ degrees days, no lower than 55 degree nights) you can plant them outside. Here are some more tips on growing bell peppers.
Peppers grow well in containers (which is how I grow mine these days). I usually will plant 1 pepper in a 3-gallon container, or two plants in a 5-gallon container.  You can obviously also plant them in the ground.
Set the peppers in an area where they get at least 6 hours of direct sun a day.
Now because you have no idea as to what pepper variety your seeds came from, it’s hard to know how long it will take your seedling to go from planting out until you have some “green ripe” peppers, much less fully ripe (red, orange, yellow, etc.). And again, likely the pepper you saved seeds from was a hybrid, so you won’t know exactly what your pepper will end up like until it produces the fruit.
Have fun growing your grocery store pepper plants!
Starting Pepper Plants Indoors – Seed Starting Under the Dome

Starting pepper plants indoors is really the only way to go if you plan to grow your pepper plants from seed. Unless you live in a topical location, your season probably isn’t long enough to start your seeds outside and still get ripe fruit from your plants.
Is seed starting difficult? Nope, it’s easy. You can go the route I went in the video below, or you can just use paper cups with some seed-starting mix. Either way, I think the absolute hardest thing is choosing which pepper varieties you want to grow from seed!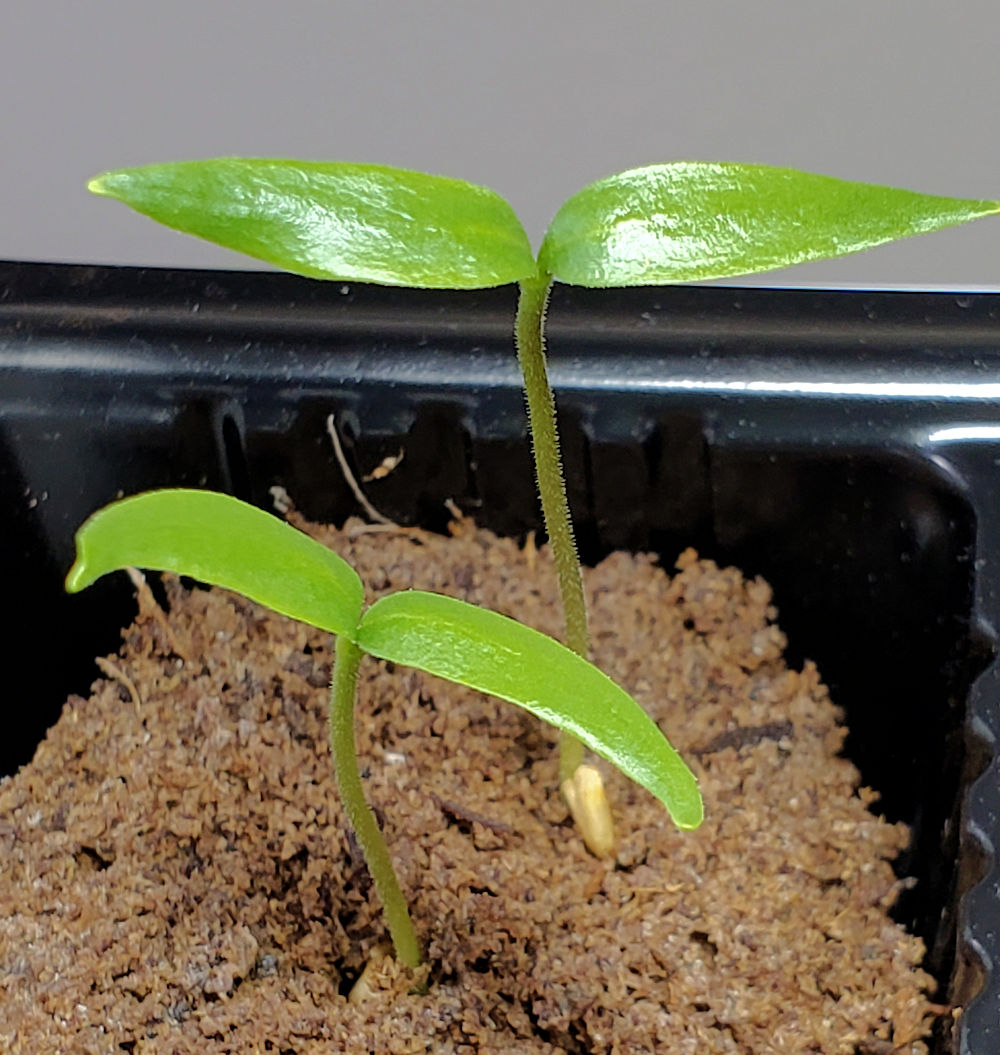
Starting Pepper Plants Indoors
This year (2020) I have so far planted the following pepper varieties:
- Buena Mulata: A purple-fruited cayenne type of pepper (hot). Starts as purple and ripens to red.
- Tricked You Hybrid Jalapeno: A very low-heat jalapeno, so you get the flavor without the spice. Starts out dark green and ripens to red.
- Purple Jalapeno: This jalapeno starts out purple and ripens to red. Since I also planned to grow the no-heat jalapenos, I wanted my hot variety to be a different color to easily tell them apart. Medium hot.
- NuMex Suave Orange: A very low-heat habanero; it will let you enjoy the fruity flavor of a habanero with the blistering heat. Starts green and ripens to orange.
- Bill’s Striped: An interesting striped pepper which is shaped kind of like a cone or horn. It’s striped cream and green when young, and then cream, red and darker red when ripe. Sweet.
- Giuzeppi: A Hatch chile pepper, it’s a low-heat variety. The Scoville rating is around 1,500 so it’s good for someone who like just a tiny bit of heat. Starts out green and ripens to red.
- Sweet Banana: An old favorite, sweet and no heat. They are very prolific, and I’m using it as part of an experiment. Starts out a light yellow-green and ripens to red.
- Roumanian Sweet: So far my only bell pepper of the year. Starts out a very pale green and ripens to red. Sweet.
I plan on some more, but the above are the seeds which I have started so far. I have to get these farther along so I can plant my ornamentals and maybe another cayenne-type. It’s called running out of space (yes, I planted more than just peppers, lol).
Starting Seeds Under the Dome
When starting pepper plants indoors, you’ll need your seeds, some water and your planting medium. If you want to go the paper cup route, here’s a post on how to plant pepper seeds in a cup. However, this year I’ve decided to use the Park’s BioDome for starting my seeds, and that is what you will see in the video.
You’ll notice that I also use a seed germination mat when planting pepper seeds. Most peppers like bottom warmth for germination, but if you don’t have one, just make sure you find a warm spot after you plant your seeds.
So how long does it take for pepper seeds to sprout? It depends on the variety, the warmth you can give them and the freshness of the seeds. I got lucky and almost all f them germinated within a week. The two hold-outs are the NuMex Suave Orange and the Roumanian Sweet. The NuMex Suave Orange isn’t all that surprising — it’s a capsicum chinenses, and they tend to take longer to germinate. Roumainian Sweet — well, maybe it just needs a little more coaxing to wake up from its sleep.
Starting Pepper Plants Indoors – Video
Here’s the video for planting pepper seeds in the Park’s Bio Dome. Hope you enjoy it!
Planting Pepper Seeds Experiment – Planting Domes

I mentioned in my peppers planned for 2020 post that I was going to experiment starting seeds. My setup is different now (lighting, counter space, etc.) so why not try something new? The video I’ve included below helps to describe what’s new for this year, but read on for the details.
Setting the Stage for Planting Pepper Seeds
When I moved, I gave away of a lot of my old supplies — cheaper to re-buy than it was to move them. One of the first things I re-bought was a seed germinating heat mat. This house is cooler overall, so I know the seeds will appreciate the warmth (and will germinate faster).
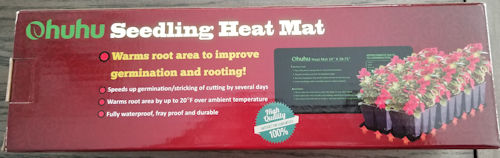 Lots of them on Amazon these days, which is where I buy something like 95% of my supplies. I looked for something inexpensive and had a decent rating (I know, real scientific). Here are some seed germinating heating mats if you want to look them over. But, the one I got was made by Ohuhu.
My real experiment is going to be testing an inexpensive germination dome setup against one of the more expensive seed starting Bio-Domes. I got a set of 10 trays for starting seeds, which also came with some teeny tools and some labels; I think I paid around $15 for it. Of course, I need to supply the seed-starting mix and a seed-starting fertilizer (regular stuff, just really diluted).
The Bio-Dome is substantially more expensive, although it does come with the seed starting plugs and some fertilizer. It’s also more solidly made. There are several version of it, but I got the one that had 18 sections. (I felt it was more in line with the size of the sections in my mini-domes.) The advantage to this one is with the length of time the plant can stay in the dome, and the ease of transplanting.
Pros and Cons (I Think)
As to the inexpensive heating mat — that’s just a pro all the way — unless your seeds need cold for germination, don’t try germinating seeds without one.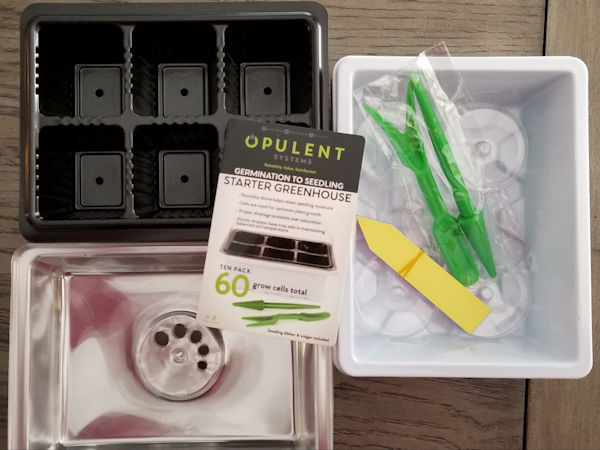
For the inexpensive set of 10 trays (with small domes included), the pro is definitely the cost. Supplying the seed starting mix and fertilizer is kind of a given, so that’s not a pro or con. The con is the construction — as you might guess for the cost, it’s a bit on the flimsy side. But I think I can get several uses out of one dome set.
The unknown is how difficult it will be when it comes time to get the seedling from its cell into another pot, prior to planting in its final location. But as silly as they may seem, I think those little tools (in green in the photo) will help. Otherwise, I am liable to crush the black cells trying to pop out the plants (like I said, they are flimsy).
As I’ve been writing this, I’ve also been looking over the inexpensive domes. and I may have to either poke another hole or two on the bottom of each cell, or make the existing one a little larger. But that shouldn’t be too hard.
For the more expensive Bio Dome, the pro is that it’s more solidly made and comes with the plugs (what you plant your seeds into). And it also has fertilizer included. Oh, and the watering system ends up being self-watering — far less monitoring for drying out.
The con is the price; they aren’t really cheap, but if they live up to their reputation of being able to keep the seedlings in the tray longer before transplanting, that will help. And if they also live up to the claims of a super-easy transplant, that will make things easier on me, seeing as I will be transplanting 30+ seedlings of various kinds (peppers, tomatoes, etc.).
The unknown is exactly how well that will work! From the demos I’ve seen, it’s super-easy to pop out the plug and transplant to its final location; no in-between stage needed. Hmmm. I will probably still do an intermediate stage for at least some of them, to help harden off the plants before putting them into their final locations in the garden.
Lights, Action…Video!
Here’s the video demo I did comparing the systems — I hope it’s helpful for you, to see the differences in the two systems. 😀