Showdown – Ghost, Scorpion and Reaper Peppers
Time for a pepper showdown! It’s a comparison of Bhut Jolokia (Ghost), Trinidad Scorpion, Carolina Reaper and Jay’s Peach Ghost Scorpion — the hottest peppers in the world. Come and join me?
Bhut Jolokia (Ghost) Pepper
I already have a post from some time ago, where I grew a Bhut Jolokia pepper plant. It was several years ago, and I’ve not re-grown it since. It was rather nice — it grew about 2 feet tall, and was quite bushy. The peppers were a pretty red, and resembled a cross between a habanero and a Fatali pepper. The heat was just over 1,000,000 Scoville. (For reference, the hottest habanero is less than half that, and a jalapeno comes in at about 5,000 Scoville.)
Trinidad Scorpion Pepper
Bhut Jolokia held the title of hottest pepper for a few years, but then the Trinidad Scorpion took the crown in 2012 with approximately 1,200,000 Scoville. This will be the first time I’ve grown the Scorpion pepper, so I am interested to see what I get, for both plant and fruit.
Jay’s Peach Ghost Scorpion Pepper
This is supposed to be a stable cross between the ghost and the scorpion peppers. The pepper is supposed to be larger than either of its parents, The color is different — a more pastel, rather than the brightness of the Jolokia and Scorpion peppers. From the photos I’ve seen, it’s really pretty. The heat is supposed to be somewhere between the two – or so I understand.
Carolina Reaper Pepper
Poor Scorpion — it only held the title of “World’s Hottest Pepper” for one year, because in 2013 he Carolina Reaper pepper took that honor. I tried growing it once, but ran into a bit of a problem and the plant (sadly) didn’t survive. Time I tried again, I think, because the fruit looks quite interesting. It racks up something like 1,400,000 Scoville.
How This Will Work
Unfortunately, or maybe fortunately, this experiment will take awhile. When it comes to these peppers, the seeds take a long time to sprout — somewhere between 3 and 5 weeks, if I recall correctly when I grew (or tried to grow) Bhut Jolokia and Carolina Reaper. I have no reason to doubt that Jay’s and the Scorpion won’t take just as long to germinate.
The showdown will really start once the seedlings are large enough to go out into the garden. I will be comparing:
- Plant height — is it a tall plant or short?
- Plant width — dues it grow up or out?
- Plant vigor — how well does it take to outdoor life? Also, is it a prima donna or is it easy to grow?
- Time to fruit — how long does it take the first fruits to set?
- The peppers themselves — what they look like, how big are they — things like that.
The one thing I will not be comparing is the heat! I am not brave or stupid enough to actually try to eat one of these peppers — habaneros are as hot as I feel comfortable going.
What to Do With the Fruit?
I might try drying some and grinding them to a powder — I’d only need a minuscule amount to heat up a pot of chili or a large bowl of salsa. I probably will go ahead and save some seeds from each of them, though. Before I do, I’ll put some insect netting around the flowers I want to use for the seeds, so I don’t get cross-pollination.
Hmmm, now that I think of it, I may try doing a deliberate cross-pollination fo one flower bunch, just to see what I get. It would be interesting!
 Stay Tuned!
I will be posting throughout the year, with photos — I may try some videos as well, once the plants are large enough. In my little corner of the world (S. Florida), the plants will have a very long growing season — they should be fine up through the first frost. And of the winter of 2016-2017 was anything like 2015-2016, I may be growing these peppers for quite some time!
Recap of the Last Garden Season
I know, it’s been awhile and things have happened. But, time for more peppers and updates. I do have some new plants in the garden, and I do have some thoughts for pepper-y experiments this year. But first a recap on my last posts.
A Recap For the First Greenhouse Garden
First a recap on how the peppers in my previous posts went. I wasn’t used to having a greenhouse, so it threw me off my game a bit, trying to get used to it (compared to the outside plants). I will say that the peppers definitely did grow, but still had some challenges.
Yellow Cayenne was a trouper — it wasn’t a very big plant, and its pot got invaded by some ants (yuck), but it produced a lot of nice peppers.  I pretty much left them on the plant until they were a lovely yellow color. Quite hot, and I dried quite a few, for later use.
My habanero (orange, no special variety) grew to a large size and produced a lot (and I do mean a lot!) of peppers. Very hot, as you might imagine — I had so many I didn’t quite know what to do with them! Time to give away some peppers!
Dragon Cayenne — oh boy, that plant wanted to take over! If you ever want a pepper that you wish would stop producing peppers because you already had a basket (or two) full, this is a pepper for you. And it’s no mean feat, because the fruits are smaller than the habanero, and much smaller than the Yellow Cayenne. The plant grew to about 3 feet tall and didn’t want to quit.
My Cajun Belle and regular bell peppers did so-so; nothing to write home about. I seem to be able to grow hot peppers well, but I don’t tend to have luck with bells.
Fooled You jalapeno grew quite large, but about the time it began to put out flowers and fruit, most of my greenhouse plants started to get some sort of weird mold or fungus or something. Alas, Fooled You succumbed. (Dragon Cayenne didn’t, though.) I did get some peppers off Fooled You, though, and they lived up to their billing — a nice jalapeno taste without the heat.
The tabasco plant did well, but it had a hard time competing with the Dragon Cayenne. I’m still not overly impressed with tabasco peppers, taste-wise, although it did produce plenty of peppers.
Purple Flash was a flash in the pan. It grew nicely for a few weeks, then promptly died. It was outside the greenhouse, and I am not sure if it was the torrential rain we had or if it was that the plant wasn’t as good as it could have been. It wasn’t until after I got it home from the store that I saw it had a few leaves that had a white residue on them. I plucked the leaves off, but it (the white residue) kept trying to come back.
The other peppers mostly sprouted, but never seemed to make it beyond the seedling stage. Not sure if it was the Autumn sun not being strong enough for the window I had them in, or something else, but only Fooled You made it from seed to mature plant.
Greenhouse Growing
I don’t think I situated the greenhouse well — I probably should have faced it along a north/south direction instead of an east/west. I suspect it would have given me better ventilation, as I think the black mold or whatever it was had something to do with the ventilation (or lack thereof). It also didn’t help that I had an extremely wet September, a wet October and it didn’t dry out appreciably until somewhere between Halloween and Thanksgiving.
The heat inside the greenhouse was actually fine for the peppers, but their pots seemed to dry out faster. Although it might have had something to do with the grow bags, I don’t think that was all it — I had some regular plastic pots in the greenhouse, and they seemed to dry out faster, too. And because the watering became somewhat uneven (didn’t help that I didn’t want to go out in the rain to water the plants in the greenhouse), the plants probably didn’t reach their full potential. (I shudder to think of what the Dragon Cayenne might have done with optimal conditions…)
The greenhouse was great that winter, when we had a few cold snaps. Just zip it up, and the plants inside were nice and cozy.
The greenhouse covering lasted over a year and a half before its seams ripped. The covering itself is fine, and we still use it as tarps, but the stitched seams couldn’t stand up to the Florida climate — our sun is brutal, and the humidity didn’t help any. So long to the covering! I could buy another but…(see the next paragraph).
All is not lost. The steel frame is in great condition, and I am using it as, well, framing! I have trellises strapped to the frame on one side (mostly for the tomatoes and cucumbers), hanging planters with strawberries along the opposite side and plenty of access to all the plants from both sides. The shelving I used is still fine (a very tough, strong plastic), so I can grow smaller plants in pots on it. Right now I am moving things around, and situating the latest peppers where I think they will do best.
This is a long post, so I’ll go for now and let you know what’s growing for this season with the next post.
Soils and Soil Amendments

What’s the dirt on soil and amendments? Do you just need “plain old dirt” or some fancy mixture in order to get a nice harvest of peppers? Let’s get down and dirty, and talk about soils and amendments.
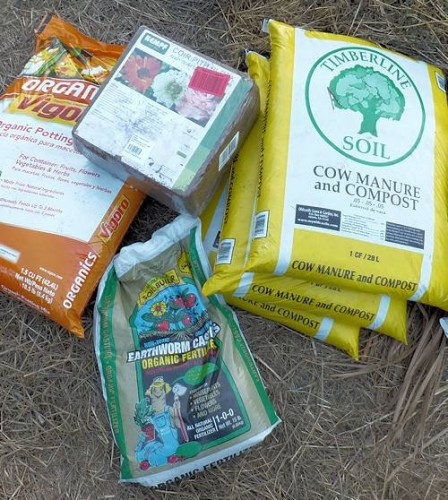
Some soil amendments, including coconut coir, earthworm castings and composted manure.
Three Main Soil Types
In the grand scheme of things, there are three main soil types found in nature. Yes, there are lots of sub-types, but they all ultimately fall into these three:
- Sandy: Whether coarse or fine grained, sand is most notable for its drainage, which is excellent. Unfortunately, it’s usually a little too excellent, and your plants get thirsty again a short time later.
- Clay: Clay, on the other hand, keeps moisture in the soil…a little too efficiently. Clay soils stay wet for a long time, and they compact easily, so plant roots have a tough time trying to get air.
- Loam: What we all wish we had! Loam has good drainage, but keeps moisture in the soil. It’s “fluffier” and although it will compact down, it doesn’t do it as readily as clay.
If you’ve got an in-ground garden and have sandy or clay soil, they would both benefit from adding some good-quality compost. Compost has the effect of trapping moisture in sandy soils, while “fluffing” up clay soil. And what about loam? Adding compost at least once a year to your beds will help to keep your loam in top condition.
But…what if you have a raised bed or container garden?
Soils for Containers and Raised Beds
First, it’s more appropriate to call what’s put into raised beds and containers a “potting mix”. That’s because there’s usually very little soil in the mix.
These potting mixes are usually composed with some combination of:
- Compost:Â Used for adding structure to the mix.
- Vermiculite or Perlite:Â Used to provide air space for roots.
- Peat Moss or Coconut Coir:Â Used to help retain moisture in the mix.
There are other goodies that can be added, but these are the main ingredients.
Yes, there are all kinds of recipes for the above. The most well-known is called “Mel’s Mix” which is 1/3 vermiculite, 1/3 peat moss and 1/3 blended compost. My personal favorite includes some additional amendments.
Soil / Mix Amendments
These are “goodies” added to the soil that aid the plant’s nutrition in some way. The most common is earthworm castings, which both conditions the soil / mix as well as provides some organic fertilizer. Another amendment along these lines is kelp meal
Something newer to the world of gardening are the rock dusts. These are full of trace minerals that tend to be missing from pretty much all soils and mixes. These rock dusts range from dolomite limestone (found in most garden centers) up through mixes like Azomite, Elemite and Gaia Green Glacial that tend to be more difficult to locate (I get mine from Amazon and/or Ebay, since I can’t find them locally).
Earthworm castings and kelp meal are pretty well-recognized as being useful soil / mix amendments. Rocks dusts? I am currently running some tests, and although initially encouraging I still have more testing to do. However, I do hear a lot of good things about rock dusts. In fact, Earthboxes come with a package of rock dust with 16 trace elements, so it’s definitely gaining in popularity. I’ll be doing a post on rock dusts at some point.
Where is the Fertilizer?
Yes, technically you could call fertilizer (N-P-K) a soil amendment, but that’s a subject that calls for its own post. And in fact, I do have one on organic fertilizers, if you’d like to read it.
Should You Add Soil Amendments?
Whether you have in-ground garden beds, containers or raised beds, it’s probably a given that you need amendments of some sort. The question is what kind and how much?
Compost is what I’d recommend for pretty much anyone. After that, it’s a matter of what you can afford, although minimally I would suggest vermiculite and/or perlite for aeration if you have heavier clay soil, and peat moss or coconut coir for sandy soils to help hold in some moisture.
Earthworm castings and kelp meal are excellent soil conditioners, while the rock dusts add the trace minerals.
Can your grow your peppers in less than optimal soil? Sure you can; it’s more a matter of what kind of harvest you want. Adding soil amendments help your plant to grow healthier, which in turn lets the peppers flower and fruit more.