Planning the Garden, New Location

Planning a garden is both stressful and a whole lot of fun! Why both? If you’re like me, you don’t have a ton of room, but there is so much you want to plant. 😀
Moving the Garden
My garden planning is way different this year from any year in the past. Why? Because I moved from South Florida to Tennessee — a really big difference as far as climate goes, not to mention things like sunlight, soil, etc.
For instance — I was trying to plant some daffodil bulbs (always wanted to grow them) several weeks ago. I discovered that the soil here is very different from S Florida. Down there, it was mostly sand — up here, it’s mostly red clay and rocks. I did get some daffodil bulbs planted, but it was a losing battle.
I had a nice spot all picked out for the garden, about 12 feet by 7 feet, perfect sunny spot until afternoon after which I get dappled shade. I even got a compost tumbler and had it set up nearby. When the reality of the soil sunk in (so to speak), my plan to rototill and amend with compost, etc. got thrown out the window. *sigh*
Grow Bags to the Rescue
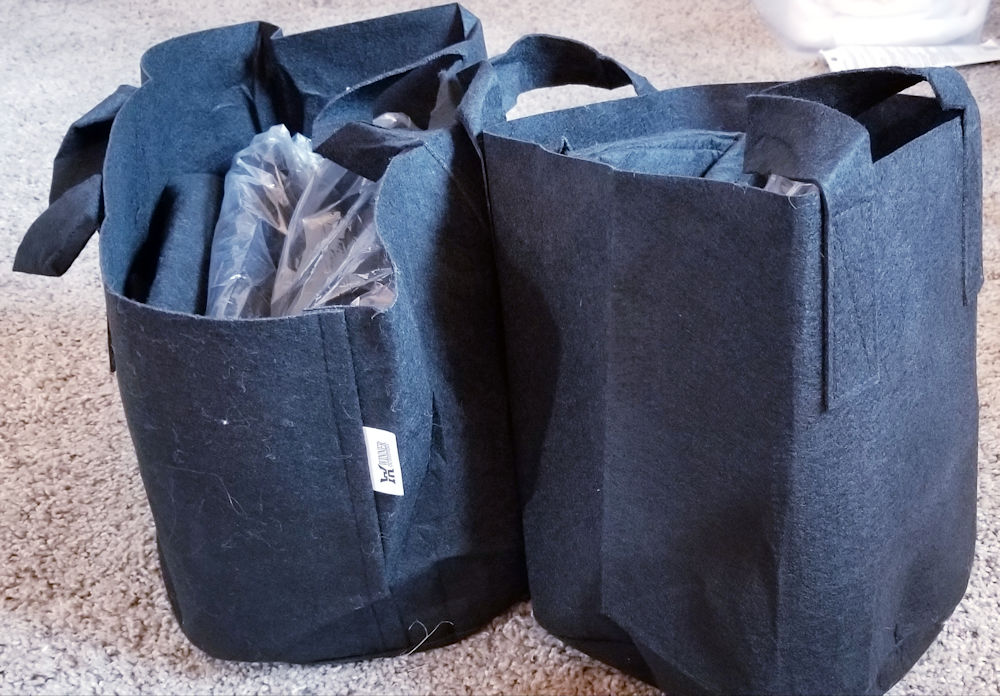 Fortunately, I’ve had some really good experiences with grow bags, so when the planting in the ground plan went out the door, the grow bags stepped in. I’ll have to get a lot of them, because now it opens up a few other planting spot options. For example, I’ll have a great place away from the main growing area for some ornamental peppers.
How many grow bags you ask? Probably at least 30. No, not all will be peppers — gotta have some tomatoes, some cukes, lettuce and some for those daffodils! Hmmm, might end up being more than 30. I’ll have some 3 gallon, some 5-gallon and a few 7-gallon grow bags. Thought about some 10-gallon, and I haven’t decided.
I actually already bought a few 3-gallon grow bags and 5-gallon grow bags, because I wanted to re-acquaint myself with the sizes before getting a lot more. The 3-gallon will be be great for the ornamentals and some of the smaller-growing peppers. The larger-growing will need the 5-gallon.
(Note: If the above links are somehow not working, try these for the 3-gallon, the 5-gallon and the 7-gallon grow bags. Oh, and the compost tumbler as well.)
Climate Differences
This will be really interesting. For where I lived in S Florida, we had two short growing seasons — from about mid-February to late April, then from late August to November. From May to late August the plants just keel over — if not from the heat and humidity, then from diseases attributable to the heat and humidity.
(But due to the number of hurricanes we’ve had come near to where I lived, I had to quit growing in the August -> November season.)Â November to February was too iffy — sometimes we had cool winters, sometimes we had freezes and I lost most of my plants.
Now that I am in USDA zone 7a, my last average frost date is around the middle of April, and I can expect the first frost somewhere in October. Instead of two shorter seasons, I have one longer one.
OK, enough about the move! The next post will be about the peppers I am planning to grow this year.
How Long Do Pepper Plants Live – Update

How long do pepper plants live — really? In the years since my original post, I’ve come to think somewhat differently about this interesting plant and its fruit. And while I don’t know that I will be able to speak to bell peppers, I think I will be able to talk about sweet and chile peppers.
 (The reason I can’t speak to bell peppers is that to date, I’ve never had one last very long. I have bad bell karma, I guess.) ;) However, those who have better luck with bells may be able to relate to what I’ve discovered.
Getting in the Zone
How long your particular pepper plants live is dependent upon what plant hardiness zone you live in. Peppers are really warm-weather plants, and they can’t handle frost and freezes. If you live in zones, say, 8b to 11, you can probably overwinter your peppers outside. You may need some frost protection from time to time, but if you can do that, it’s a possibility.
North of 8b, you’ll have to overwinter your plants in containers inside. If you have a heated greenhouse, that’s the best option. Otherwise, inside with grow lights is what you’ll need to do.
Why Bother Keeping a Plant Alive?
Good question! Typically, I don’t bother with “everyday” plants — those peppers that I can easily grow from seeds or find at a local big box store. However, a plant that is harder to replace, or one that has produced extraordinarily for you, may be a candidate for keeping alive.
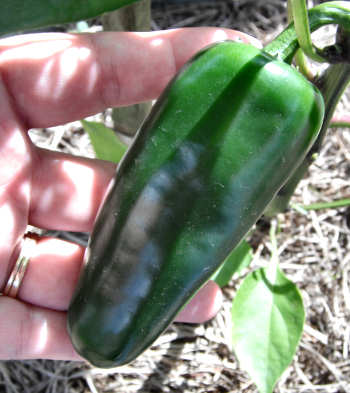
For example, I really enjoy the Fooled You jalapeno pepper that I grew a couple years back. It’s a hybrid, so I can’t really save the seeds. This time, if one of my plants (I have three seedlings) is outstanding, I am going to try to keep it going.
Preparing Your Pepper Plants
How do you prepare your peppers? Be prepared for some “tough love” in order to overwinter.
If you can routinely expect more than two or three freezes in a winter, you’ll need to uproot your pepper and put it in a container you can manage to move around; probably between a 3 to 5 gallon container. If you are already container growing and can move the container inside, you’re a step ahead. If you’re digging the plant up from the ground, you will need a container ready, along with some loose but rich soil ready.
You’ll have to do the uprooting carefully. If your plant is big an unwieldy, you may want to lightly prune – enough so that you can easily handle the plant. Use a shovel to dig in a circle around the plant, starting about a foot away from the stem.
Once your have the plant dug up, gently shake the soil from the roots. Depending on the size of the roots, you may need to lightly trim them back with a sharp pair of scissors. (Or, use a larger container.)
Put some of the prepared soil into the container to about 1/3 the depth. Put the plant into the container and back fill with more soil. Give the plant a light watering, and place it where it can get some morning sun — you don’t want to give it too much sun until it’s settled into the container some.
Clip! Snip!
A few days after your transplanting, or, even if your pepper plant is already in a container, it will need a haircut. Why?
The light available to your plants in Winter is much less than in any other season (in the northern hemisphere, anyway). Inside, your pepper plant will get even less light, unless you have a very bright grow room. Your pepper plant will need fewer leaves to support while it’s in a lower-light and cooler environment.
How far back should you prune? Half its height is a good place to start. I’ll have a post about pruning peppers in the near future; I’ll link to it when I have it ready.
Food and Water
During its overwintering, your pepper will need less water — let the soil dry out between waterings. As far as food goes, you will only need to fertilize rarely, with a low-strength solution. I would say to use fish fertilizer, but only if your are over-wintering outdoors — it would smell a bit much in the house.  😉
Light and Warmth
As you might guess, your pepper plant will need as much light and warmth as you can manage, once it’s acclimated to its re-potting and pruning. Your pepper will appreciate temperatures in the low 70s, and still would like 6 hours of direct sun. Since that may not be possible unless you have a greenhouse, you will probably need to supplement with some plant grow lights.
But Really — How Long Do Pepper Plants Live?
In containers, you may be able to keep a plant going for several years. In-ground (if you are in zone 10 or 11), it could be indefinitely. In any case, you will need to decide how long your want to keep your pepper plant going, and that may depend on how well it keeps producing.
Hope this has helped some!
Growing Peppers in Containers
Growing peppers in containers is easy, and most (if not all) peppers will thrive. In fact, some were selected for their ability to grow well in a pot! Let’s look at some things to consider when growing your peppers in a container.
Choose the Proper Size Pot
It’s not so much a problem with the pot being too big, but rather don’t go choosing one too small. Although many peppers don’t grow to more than 20″ tall, they still need enough room for their roots to spread out.
For the smaller peppers (under 12 ” tall), you’ll need a 2 gallon container. For the larger pepper plants, a 5 gallon or even 10 gallon container will give the peppers plenty of room to grow. Not sure what you need? Try a 3-gallon container and a good soil mixture with plenty of nutrients.
Oh, and remember — your container needs to have drainage holes, so excess water has a way to escape.
What Kind of Soil to Use
I prefer to use bagged soil, seeing as the soil in my yard is fairly sandy. I like a mixture of composted cow manure and organic potting soil. The composted cow manure feeds the plants, and the organic potting soil lets the plant’s roots grow freely. I generally use in a 50/50 ratio (just as much composted cow manure as potting soil).
I generally avoid any potting soil labeled as “african violet” or “houseplant” or any such designation. I also like to avoid pre-fertilized potting soil. If you can’t find any “regular” potting soil, try using sphagnum moss instead, at a ration of 40/60 (40% sphagnum and 60% composted cow manure). Here’s some more information on the kind of soil peppers like.
If you have access to real compost (meaning, from your own compost pile), by all means use that! Just make sure it’s fully “cooked” to destroy any lingering unfriendly bacteria or fungi.
Feeding and Watering
Your pepper plants will very likely need more frequent watering when being grown in a container, as well as more frequent fertilizing.
Watering should be done whenever you can stick your finger 1 inch into the soil and it’s dry (the tried and true method). Soon enough, you’ll get to recognize whether that means watering every day, every other day, etc. for your particular growing conditions.
I like to use my fertilizer at no more than 1/2 strength, but I fertilize a little more often — usually once every other week. When your pepper is first growing, it needs a fair amount of nitrogen, but once it starts producing flowers, it needs more phosphorus. I prefer doing things as organically as possible, so I like worm castings, fish emulsion and seaweed extract. (See the organic fertilizer and peppers post for more information.)
If I feel the plant needs a little boost of nitrogen or phosphorus (beyond the normal fertilizing), I’ll add in some blood meal (nitrogen) or bone meal (phosphorus). Both can be found in most garden centers.
I am debating adding an organic tomato fertilizer to this mix — after all, tomatoes and peppers are related and have similar requirements.
Staking or Caging
Some peppers may need to be staked or caged due to their growing habits. I usually find that bell peppers need to be staked, due to fruit weight. Large rangey plants like jalapenos may need to be caged if they start overtaking your container gardening area.
Ultimately, it’s up to you, especially since there are now peppers like Mohawk that are more of a draping/hanging pepper, instead of upright.
Those Really Hot Chile Peppers
Please keep in mind that if you decide to grow the really, really hot chile peppers (like scotch bonnet, habaneros, etc.), please don’t do it around small children or pets. Just touching the fruit of these plants can cause severe irritation and burning.
I also would recommend staking or at least caging such chile peppers, if they are in an area where people will potentially be walking near them. All you need to do is brush by the peppers to get the oil on your clothes/body.
And remember, when staking or caging the extra-hot chile peppers, please use rubber gloves — preferably the disposable kind. That’s a lesson I had to learn the hard way. (And naturally, also use the rubber gloves when harvesting the peppers.)
Growing Peppers in Containers is Easy!
That’s pretty much all you need to know about growing peppers in containers. This means that even if you don’t have a yard, you can have garden-fresh peppers. Just make sure that the spot where you plan to put the pots gets at least 8 hours of sun a day, and is in a warm spot (peppers like heat).
If you plan to grow your peppers from seeds, you may want to check out the growing peppers from seeds post. If your inclination is towards growing chile peppers, check out the growing chile peppers post.
Enjoy!